11/11/2013

Sew Scandinavian

Rigel_bomber_diy_knit_dress

This post is the culmination of some serious last minute sewing. It’s not like I haven’t had almost half a year to prepare an outfit for the cute Scandinavian Sewing Series being hosted by Boy, Oh Boy, Oh Boy. These last few months have been all kinds of crazy. Right now I’m coming back to reality after an amazing weekend and months worth of preparation for the recent The Crafts Sessions retreat, where I was teaching sewing, of all things! I promise a full report soon. So Scandiniavian style ey? A fun theme, but it had me scratching my head. Scandinavian kids style is pretty definitive and Sabra totally nailed it here and Mie here. But Scandinavian adult fashion, what exactly is that? My usual search for Pinspiration confirmed my suspicions about Scandinavian style as less is more, simplicity, clean lines and understated cool. Which morphed into a striped knit dress, polka dot bomber jacket and some clogs. We’ll just go with Essence of Scandinavia, yah? diy_knit_Dress

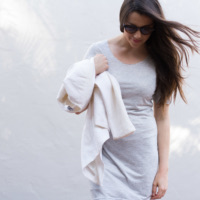
Starting with the dress. The fabric is a viscose lycra knit from here, purchased with loose plans for a casual dress. But I’ve been unsure what season to sew for, which is happening a lot lately. I kind of fell in love with wearing Winter clothes in Melbourne and coming back to 30 degrees has been brutal. So there is definitely a bit of Seasonal Sewing Disorder going on. It was going to be above knee and a-line for summer, but I love 3/4 sleeves on everything so its ended up being trans-seasonal. I started with a great fitting long sleeved t-shirt and extended it downwards and outwards. I thought I’d like to make a square-ish neckline and with a facing, just for something different. I carefully drafted the facing, lovingly interfaced it, attached it and put the whole thing on to find the weight of the jersey pulled the facing right up and out of the neckline, like a big fat sad bottom lip. Which coincidentally, matched mine. Anyway, thankful for lessons learned and I saved the dress by folding the neckline over to the inside and top stitching. Yep, the perfect garment is indeed a myth.

Rigel_bomber_jacketA Bomber! A Bomber! I made a Bomber jacket and its quite possibly one of my all time fav handmade pieces. Kind of a good thing, considering how emotionally invested I was in it. I cut into one of my most prized pieces in the stash (which is quite modest in case you’re wondering), a thrifted $1.50 piece of navy polka-dot chambray. Who even throws out polka-dot chambray? And didn’t they know I would have paid at least twice that? Anyway, its been saved for something spesh. Quite recently and very excitingly, I nearly fell over myself at the chance to test one of The Papercut Collective’s new patterns from the mind-blowingly gorgeous collection, Constellation. Which was just released today! I really could have tested them all, but went for the Bomber jacket, the Rigel Bomber, the very thing I have been coveting all year, all over Pinterest and waiting for an inspiring pattern. Printed Bombers, with their unattractive boxy, masculine shape made up in a cutesy print just do it for me. It was a toss up between this print and a couple of Nani Iro florals, so I’m thankful to everyone who peer pressured me into the dots on Instagram.
Rigel_bomber
Now, I’m sure part of the reason my love for this Bomber runs so deep is it’s as good looking on the inside as the outside. When I wear it, I feel…neat. Schmick. Well put together. So good that adjectives fail me. You can’t help but feel like the shit when you’ve just tackled welt pockets, chunky zips and facings. All of which make for a pretty special garment. All of which were potentially anxiety inducing if it weren’t for good instructions and diagrams there to hold my hand. I loved the suggestion of binding the edge of the facing with bias tape stead of serging. I made actual bias binding. Now that’s commitment right there. And now I am certain that how much you love your hand-makes in the end is entirely related to how much care and love you bestow on the little details during its making. Of course this only applies if the love is reciprocated with the thing working out awesome!

Spotty_rigel_bomber

Lucky it did work out, considering I bi-passed the muslin. The fit is good; I could do with some more length in the arms but I was gifted excessively long arms. I am the ‘reacher of high things’ at work. If I was going to be wearing the Bomber zipped up, I could do with a bit more room in the shoulders but I intend to throw it over things so this is not really a problem. The only mod I made was to shear off some of the width of the neck ribbing but just because I liked the look of it with less. Next time, and there will be a next time, I may add some length to the arms and body but again, will likely be wearing it with the sleeves pushed up so it might not be necessary. I think it says a lot about a pattern when you’re already planning the next one before it’s finished!

Self_drafted_knit_dressWell, that’s me vibing Scandinavian style. Be sure to check out the rest of the fun over at Boy, Oh Boy, Oh Boy.

12/10/2013

The Original Satsuki

_MG_7281
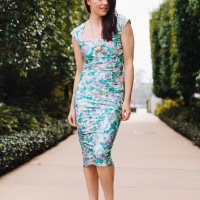
Aloha! Can’t quite believe this dress was made by yours truly a year and a half ago, and its only just made it to the blog now. This was my first go at Satsuki by Victory patterns, the same pattern behind this dress for Project Sewn. I made it up for a special occasion. The special occasion being that I was leaving the house, sans kids, for an occasion. Some sort of partay or gathering (?) at a swanky (cringe) underground 1940’s style bar. Which was obviously deserving of a new dress. Anyway, the event was on a Saturday night and on Wednesday I realised the over-priced pants that I’d bought for said occasion, just wouldn’t do. So it a seemed a perfectly do-able, even sensible idea to just whip up a Satsuki. Like an omelette!
_MG_7307The fabric is a silk crepe de chine from here. I know it’s all silk this, silk that these days but the ratio of silks to cottons (and other perfectly practical fibres) that we get in is pretty high. Anyway, I really loved this pattern, I mentioned here how it nips you in at the right bits and I think it’s a style that flatters a huge variety of figures. It’s put together really nicely too and I appreciated the lessons learned in hemming curved sections of seams by pulling a thread. My only gripe is that being a bit round shouldered, my shoulders never seem to poke through the little cutouts, which creep to the back. Hence, the dress is heavily ‘arranged’ in these pics._MG_7215
_MG_7361In the end it wasn’t exactly ‘whipped up’. I finished it on the night pretty much on the way out the door and did hasty a double fold hem, where a hand-stitched one might have honoured this fabric. But what’s a girl to do, I was already running late! If you are contemplating making a Satsuki of your own, I highly recommend this pattern. A relatively quick make with good instructions and a new technique or two to learn makes it a winner. It also sews up into a top,  Crab and Bee’s made a beautiful shibori dyed version.
_MG_7201
I had a moderate to good time, topped off by being in bed before midnight. Lets be honest, there were more than a few times when I thought about being home in bed. Or sewing. Cough antisewcial Cough.

26/09/2013

One for the lads

It’s been a while hasn’t it? I feel like I’ve dropped off the kiddo sewing bandwagon. It’s not that I don’t love sewing for my boys anymore, but more the fact that I’m working in a fabric store, surrounded only by apparel fabric for adults. That and the thrills I get from the challenge of sewing adult clothes that, on a good day, can look not so distinguishable from store bought stuffs, may have something to do with it. Every week is selfish sewing week over here! But I do miss boy sewing, and it was totally refreshing to be back playing with thriftstore t-shirts, unlikely prints and weird iron-on transfers, testing out a new kids pattern, the Bateau Neck Top pattern by Aesthetic Nest.

I love a good neutral pattern and when I checked out all the cute girl versions of the Bateau I wondered what Anneliese thought I would do with such a cute ‘pretty’ looking pattern. Didn’t she know I come from the land of trucks and testicles? Anyway turns out she had this all in mind and lured me in with the challenge of coming up with a boy-ish Bateau. I didn’t have to try very hard to make it look ‘boyish’, the Bateau is actually cleverly drafted to be quite a gender neutral shape, much like the Oliver and S Sailboat top. There are lots of cute add-ons like ruffles and pleats and a dress extension that I didn’t think Hudson would appreciate so I just made him a straight up Bateau with the addition of a lizard king, in a size 4. He is 2, but a whopper and currently sharing some of Archie’s sized 4-5 clothes, so it made sense.

The main fabric is a Nani Iro knit, the back a thrift store knit and the sleeves cut from one of his baby sweaters. Something else I’d forgotten about sewing for kids is how much faster everything is. These days, ‘whipping’ something up equates to half a days sewing. That’s instead of a week. So the Bateau takes no time at all, probably an hour from start to finish and quicker still when you’re pinching already hemmed parts! I loved that the neckline is faced and not attaching ribbing was a pleasure. The royal lizard made an appearance with some Leslie Riley Artist transfer paper (print it out, iron it on ) except this was the second attempt because the first lizard was about six months old and didn’t take to the fabric at all. So if you’re going to use this stuff, print it fresh.

Oh now I remember, it was the blurry photos that did my head in!

18/09/2013

Sewing Solids #3 and #4

IMG_6924
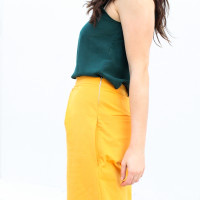
This post should actually read ‘The Boring Black Shorts’. Because they are! The plainest, most unexciting, unadventurous item of clothing made so far. And exactly why I love them I bought this fabric quite a while ago, purely for it’s good bottom weight and nice feel. Technical! And now that I think about it, a plain black linen cotton seems a pretty unlikely purchase for a print fiend. Maybe at the time I already knew the closet was headed towards print Armageddon. But the thing about the boring black shorts is they’re actually pretty awesome. Pretty and awesome, even. First of all, with just a few mods this pattern gives a fit that you can be hard pressed to find in a store bought short. Second, they’re just a good looking pair of shorts, that rare variety you could even wear with a heel. And don’t get me wrong, I love my minty polka dot pair but now in a solid I’m really appreciating this pattern and all its charms: welt pockets, side pockets, subtle scallops, top-stitching etc. And more surprising still, the boring black shorts have inspired a whole new flurry of sewing activity: things to wear with them, like this top.
IMG_7168
Fabric: Linen- cotton- lycra blend.
Sizingxs, same as this pair. If between sizes, go down and especially if fabric has width-ways stretch. This pair actually fit a lot better, whereas the spotty pair give me camel toe when driving.
Mods: The usual for this pattern; 3/8″ off the sides and a wedge off sides of back pieces, where hips are would fill out if I were endowed some. I shaved a little off the hem of the back pieces, about 1/4″.
IMG_7061
Do you ever find yourself spending all this time dreaming up the perfect ‘to-sew’ list only to have something totally random pop up and skip to the front? I think it’s called ‘inspiration’ and it is does not care about my carefully curated sewing queue. The Hannah Top by Salme Patterns was one such pusher-inner. I’ve been noticing this silhouette around lately, ‘around’ being code for Pinterest, my only real source of what’s going on out there in the fashion world. Lots of cute cropped length tees and tanks with midi skirts and high waist shorts and loads of this 90’s neckline that I can only best describe as looking like a halter but not. So when the Hannah Top popped up in my Pinterest feed it was one of those majestic moments where trend and pattern become one. Its an interesting shape and cut-right you can wear a cross-over bra with this style. Being able to don a semi-normal bra seems to be my green light go ahead these days.
IMG_7059Pattern//Salme Patterns ‘Hannah’ Top.
Size // No games played, just a straight 8 according to measurements.
Mods // Removed darts and added width to front piece from armpit to waist in their place. Shortened to cropped length. Took 1/4″ off neckline. To cover bra straps, I widened shoulder straps approx 3/8″ and slightly changed the shape of the front piece curve. But don’t be put off by what sounds like a nightmare on mod street, all these tweaks came out of the first and only muslin (which was in a print. Naughty!).
Other Bits and Bobs // French seamed back and sides, hand-stitched invisible hem (which I will now pull out and sew with a teensy weensy hem) because its all lumpy. Telling myself it was the fabric. I used a self cover button for closure and made the button loop by sewing down the length of a strip of bias and cutting off excess. A good shortcut to remember.

IMG_7276IMG_7337The pattern has a full facing, which means no lining and no visible top-stitching and makes the whole finish ultra tight and neat. You do have to add seam allowances though. I made a cotton muslin, tried it on with the boring black shorts and decided the proportions looked much better if the top was cropped about 5″-6″ shorter. I tweaked a few bits of the pattern mentioned above, jumped right in with the silk and then it was all very obvious that cotton made nice flat darts and silk made pointy nipple darts. Not impressed. Slashing and flattening the darts upon Gerties advice didn’t fix the problem, maybe because the problem was the silk not the dart shape. So as a last resort I ironed interfacing over the darts which did flatten them and might have been a completely genius idea except you could see a the outline from the right side. So, on the verge of mega tanty I re-drafted the front without darts, kind of like the difference between the Grainline tiny pocket tank (darted) and the Wiksten Tank (no darts). I ignored the dart by pinning it shut, added a tiny bit of extra width to each side of the front piece, petering out to just the seam allowance at the waist. I think it worked because the silk is drapey and the top is a loose-ish shape.

IMG_7070
Well, that’s it, the end of the Solids Experiment. I’m free! And I don’t want to go! There’s quite a few pieces I want to sew before I run back into the arms of beloved prints. But maybe we will have a more balanced relationship now, the prints and I. Thanks to everyone who left a comment about your own personal battles with prints vs solids. It comforting to know there are so many of us of the print-happy variety. Print fiends unite! On reflection, not being able to touch a print gave me a new perspective on sewing, as I had to seek inspiraiton from things like shapes of clothes, details and obviously color. If I wasn’t ‘on solids’ when I spotted this top pattern maybe I would never have looked twice at it.  And with that I will leave you with my best face-for-radio. #keepinitreal
IMG_7154

10/09/2013

Sewing Solids #1 and #2

Lane_slipHey hey! Presenting piece one and two of the sewing solids experiment. Which I will no longer be tagging as #solidsexperiment on Instagram. I really enjoyed the change from print to plain colors. It’s had me looking at the stash with new eyes and making good color choices, mostly. And I got to try out two patterns by new kid on the block Named Patterns. If you haven’t already fallen in love, check them out. Pretty much, you could make an entire wardrobe just from their patterns alone, mixing up prints and solids forever-ever and not get bored. They’re classic but on trend, feminine but not fluffy and are very very wearable. My particular favorites are the Lane slip and Blair Batwing you see here, the Laurie T-shirt, the Julian knit dress and I cannot wait to try my hand at the Jamie skinny jeans (finally a good looking pattern). Check out this version by Very Purple Person.
Lane_slip
They’re also not especially cheap, more like mid-range which I suppose is why I had certain expectations of them. I can deal with print-out tape-together patterns. I can even deal with print-out, tape-together patterns that need to be traced but at between $13 and $25-$35 aud a pop, some diagrams among the instructions would have gone down real well (That’s what Burdastyle is for, right?). And not to undervalue that amount of time and energy that goes into the art of drafting and producing sewing patterns but anyone who sews them up, especially visual learners, knows that diagrams are your friends. So that’s my only gripe and not to be put off, they are beautiful patterns and I will definitely ‘invest’ in more…
lane_slip_blair_batwing
Pattern: Blair Batwing by Named Patterns
Fabric: Merino Jersey from The Fabric Store (just opened up in LA)
In hindsight this was not the best color choice for me. I could be wrong, but to rock neon I think you need to have a solid tan. However, I was inspired by the khaki / yellow neon combination of this outfit and just decided to ignore the obvious difference in our  skin hues. I love the shape of this top, have been wearing it every thrice-weekly and plan to give it several brothers and sisters in due time. It’s a higher neckline than I normally go for which works well with my new attempt to preserve the skin on my decolletage. I got badly burnt last summer so now I’m going to be a whitey and cover up. I also really like the fit of the top, it’s slouchy but not baggy, with cute batwing sleeves and looks great with pendants. I’d like to make anothery in a solid and also some stripes…post solids experiment.
03_09_2013_Sophie-170-500x333
I changed a little in the construction and added binding to the neckline and pinched the strips from the Mission Maxi pattern. Because this knit is flimsy I didn’t think it would look good folded under and top-stitched like the pattern suggests. But then afterwards I didn’t like the look of the binding so I folded it under again and top stitched, which took it back to the start except now it’s sturdier and the finish is really nice. I’d probably do the same thing again.
03_09_2013_Sophie-174-500x333 03_09_2013_Sophie-179-500x333
Pattern: Lane slip by Named patterns
Fabric: Wool lycra jersey from The Fabric Store
I nearly killed this dress. Not in a malicious act. Just an unwillingness to step away from the machine when tired. I’ve been feeling crapola lately, chest infections, bee stings, all those fun things and my sewing capacity has waned. Normally I’m a kids-are-in-bed-hit-the-sewing-machine sewer but some nights I’ve just had to crash. Anyway, long sob story short, I adjusted this dress to within an inch of it’s life when I should have walked away and now its royally toit. You can probably see my lunch being digested. The design of the dress is a very lovely slip with a very low back and I thought I would outsmart it with the bra thing. I decided to erect a built in bra with cups and all, using some cups from a sports top I own, painstakingly placing them evenly, sewing them into a separate facing and adding an elastic shelf underneath. It was a feat of sewing architecture and looked bloody amazing. And then when I tried it on, of course there was nothing to actually pull the elastic taut so the whole bra contraption bunched up out the front like some hideous growth.
Part two, I took the elastic out, which left a dress with cups in the front and not really anything to hold them up. In which case I would need to wear a bra, so I decided to change the back and make the scoop higher. So I just sewed a seam right up the back. Only I didn’t bother to pin because of the reckless downward spiral I was on by that stage. And I sewed it wonky. And so I sewed it again, straighter, which ate up a good portion of the back piece in the process and now it is okay for beach, not okay for school pick-up. I tried it on with a bra, realized the ridiculousness of wearing a dress with cups and a bra underneath, and abandoned the bra. And now I wear it sans bra, minimally supported. The end. So, not a complete disaster. I actually really love this dress and will definitely make another, maybe with a shallow scoop at the back and an extra inch on the length. Before the meddling, the fit was good and the shape of the neckline and knee-length are really flattering. I also added binding to the armholes and neckline following the instructions from the Mission maxi, folded it under and top-stitched again like the top.
03_09_2013_Sophie-167
Something interesting, in abandoning prints I’ve feel like I’ve been noticing more about the design and shape of clothes and appreciating nice details, like a batwing sleeve, which would normally get over-shadowed by prints. It’s also prompted me take a look at what’s in my wardrobe currently to see which solid colors could be introduced to go with all the prints. Neon yellow is not one of them. It goes with this dress and nothing else. But it was a whim, you know those ones where you throw everything you know about what suits you to the wind?! Out of my system now…

© Ada Spragg. Design by The Darling Tree. Developed by Brandi Bernoskie.

Back To Top

";