Can you believe the next season of PROJECT SEWN is almost here?! I cannot wait to see who’s in the lineup and this time follow along at a less maniacal pace. Maybe it will be like a sympathetic pregnancy and I’ll re-live all the nail-biting experiences along with the contestants. And since we’ll be in a different season this time around I’m looking forward to seeing how it influences the sewing, whether we will see more cool weather garments or not. To get everyone in the mood, over the next few days Project Sewn will be featuring a handful of bloggers sharing their scope on fall fashion. Today I’m sharing of few of my fav fall trends and sewing patterns to match….
25/08/2013
Sewing Prints vs Solids
I have this dilemma right now and when I say right now I mean since the beginning of all this sewing a hand-made wardrobe business. I like prints. I like them a lot. But the situation in my closet is this. I open it up in the morning and do you think I feel inspired? No, I am bowled over by the print army. To be fair, the culprits are not just hand-made items but this is them alone, so you can imagine what the rest is like. I’ve just finished off a few bits and pieces and attended to a 6-month old pile of mending so a fresh space is cleared for a whole new batch of projects. Only, I want to make good wardrobe choices and know that I will love to wear these things I’m about to slave over. Time for a little pre-sew closet research….
And the solids. All seven of them and two not even blogged. I’ve never seen them all lined up like this but can I just say, wow I have made some truly excellent color choices. Totally nailed an autumn palette without even realizing! The things is, I love solids and this winter almost passed I reached for the chocolate skater dress, moss green Briar and rust merino skirt daily. And sometimes I had to be like ‘Hey girl, you know you wore that yesterday… and the day before’. So, it’s all very well buying, making and loving prints but if you’re not actually going to wear print-on-print then there needs to be solids to balance them out. And since I am mostly still sewing instead of buying clothes (with the exception of underwear, good fitting jeans and pre-menstrual impulse buys) it’s not surprising that the wardrobe in it’s current state is quite un-wearable. Solution? Instead of giving up prints (absurd idea) why not commit to a small chunk of time to only sewing in solid colors?!
22/08/2013
DIY Detachable Swim Straps
12/08/2013
Bombshell This
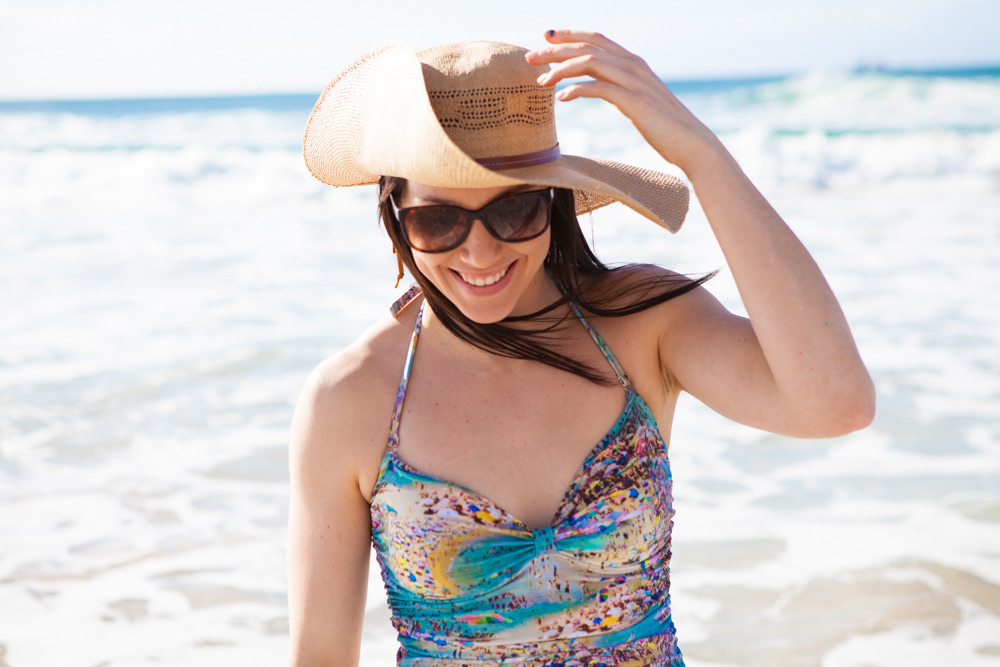
 If, like me, you’ve been drooling over the amazing Bombshell swimsuits debuting around the blogosphere right now, you’ll already be familiar with…’ERMYGAWWWWDDD…I made a…(insert profanity of choice) SWIMSUUUITTT!!!!’. This thing really is da bomb. And sewing it was actually ten times more fun and ten times less terrifying than I thought it would be. I mean, the intimidation factor was pretty high here. Swimsuits, lingerie and perfect-fitting jeans make up the tri-fector of those ‘final frontier’ garments I have mentally stowed away for later on, or at least about seven years. So, sewing an actual living breathing swimsuit is big. Sewing an actual swimsuit that fits, flatters, stays up and looks hot is bigger. And I now consider myself the proud mother of three; two boys and a Bombshell.


Let’s talk about support. If you happened to stop by while I was touching on the phenomenon of the disappearing post-breast feeding boobs, you’ll know that I don’t have a whole lot left to hold up. But that said, what is left, had better stay where they get put. So now with less to support, I’m thinking about support more than ever and did wonder how the Bombshell would fare. In a bikini top, I’ll usually go for molding, not padding and rely on halter-neck to ‘lift’. Boning and underwire don’t go astray either. So, without boning or underwire or separated cups, I just kind of hoped that a combination of swim-cups, halter neck and an under-bust elastic band would be enough to hold the girls in place at the very least, since a boost-up might be asking a bit much. Even if I did put it off for a few days, adding the swim cups was fine, as was the under bust band (this tutorial by Dixie Diy was great). So, how did the Bombshell hold up? As predicted it did not come with magical boob-boosting powers but still lovingly supports enough to flail around in the surf.

I decided to change the straps because I just prefer thinner, elasticated swimsuit straps. Maybe you’ll agree, maybe not but I feel like when you’re petite up top, a thin strap looks more delicate and a more substantial strap looks better with substantial boobage. It’s possible I’ve spent too much time thinking about straps. I used a bandeau bikini top of mine with detachable straps for a guide and made these detachable with clasps and all, only realizing later that I’m not ever going to be wearing this suit strapless. I could have just sewn them on! Anyway it was a fun exercise figuring out how to make actual detachable elasticated swim-straps and I’ll happily put together a tutorial if you’re interested…

Did I mention the Bombshell is a bit cheeky?! Not scandalously so and probably in Byron Bay no-one would bat and eyelid. But still, you got to give the locals something to talk about…
04/08/2013
Sew Bossy

I’m excited. More than normal. For a little over a month, myself and this sewing blogger you know and love have been ‘getting bossy’. We’ve been sewing behind the scenes, in our various hemispheres and today we get to reveal our Sew Bossy outfits! So just who da what is Sew Bossy? Only the funnest, coolest idea ever to grace the blogosphere, by these two crazy ladies, Closet Case Files and Oonaballoona. You can read about it here. But basically how it works is you team up with another blogger who sews, from anywhere in the world and then exchange, via mail, all the components of a complete outfit. Pattern, fabric, notions, words of encouragement etc. It’s a risk, I mean, you could absolutely love what your Sew Bossy pal sends you…or you could not. But either way you HAVE to make it. That’s the bossy part! So you just have to trust and know that if you adore the hand-made style of your Sew Bossy counterpart ( see here and here) then it’s highly likely you’re going to love what they choose for you. And that’s how I waged that whatever Andrea from Four Square Walls came up with would be awesome sauce!


I was majorly tempted by the skirt but in keeping with the spirit of Sew Bossy (which translates to me sending Andrea a complicated looking dress + a tape-together pattern) I went the dress. And though I like the few full sleeved versions I’ve seen around, I knew I’d get more milage out of a sleeveless version. Then it could be paired with tights, boots and cardis in winter and be cool and floaty in summer. Now, something shocking happened during the making. I had a change of heart re- muslins. Yes, it’s rocked my world too that I maybe enjoyed the process of making muslins for the bodice here, just a little. Three in total. Why so many? First I cut an XS and it was too tight everywhere. I pre-judged the pattern to have lots of ease. It didn’t. And because I cut not traced (bad girl) I had to estimate where the next size up would be, hence muslin no.2, which pleasingly did meet in the middle, unlike the first.


To get a really good fit some things still needed tweaking. For instance, from somewhere I picked up that to make something sleeveless its not just a matter of chopping off the sleeves, the actual shape of the armhole needs to be changed. I inspected muslin no.2 in front of the mirror and could see a wedge of fabric between the front bodice armhole and the bust point that if I pinched out would give a really nice shape to the armhole / bust section. I also took a little width out of the shoulder. On the back bodice there was also excess fabric, from top to bottom (which is more to do with the shape of my back than anything) so I pinched out a wedge 1″ wide at the neckline, petering out to nothing at the bottom. I made the new adjustments to the actual pattern, which is a first, and busted out muslin no.3; a superb fit and the reason why I now will make muslins, happily. On special occasions.

In honor of the dreamboat fabric, I had to make La Slyphide as pretty on the inside as the outside and line the bodice. Going mostly on what I remembered from this dress and a refresher from this tutorial, it was not so hard and the finish is lovely. Oh but dramas! Now after wearing it, I can see the silk I chose for lining is so fragile its starting to split at the darts! Since lining the bodice eliminated a whole bunch of seams to finish, I decided to french seam those that were left, the skirt sides and the waistline. Apart from looking pretty, french seaming meant I didn’t need to buy purple over-locker thread. I didn’t really want the buttons to be a feature of the dress so I used tiny self-cover buttons, which are pretty invisible. Apart from fiddling around with the bodice the only other mods were adding 1″ to the skirt length. It’s pretty short and I could have even added more but the quarter circle skirt ate the fabric up. La Slyphide was such a pleasure to sew. Even when I sewed late at night, the ratio of sewing to unpicking was still considerably better than normal, which I’m putting down to a very nicely put together pattern.

The most surprising thing to come out of Sew Bossy for me, was how fun and refreshing it was NOT to be in control of what was going to arrive in that package! Complete and utter trust feels pretty good and I think I actually like having someone else dictate what I make / wear…so long as it not my mum (hi mum!). Now this is only half the story, the rest is over here at Andrea’s place. And if you are even half tempted to do your own Sew Bossy exchange… don’t think, just do! All the details here.




 Bloglovin
 Feedburner
 Feedly
 Kollabora
 In Your Inbox


